Monday, May 30, 2016

DAY 11: Cut out the rot

So we started cutting out rust and preparing to cut patches out of good metal.
Battery compartment before

Battery compartment after


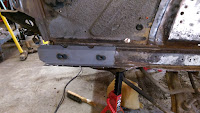
Driver side shock tower holes
Pass. side shock tower holes
Then Eli started spray painting on the driver side fender apron he had already sanded down:

Then he started grinding down the passenger side.  He decided to keep the original sticker with instructions for how to change the oil:
silver!
We got a bench grinder... technically to sharpen lawn mower blades.  But also to assist us in the patch making process.  That's our next step.  Then, welding!
Today cost: $0
Total project cost: $2,160.27

Thursday, May 26, 2016

DAY 10: Front frame rail patches

We made our first two parts purchases.  The first was from CJPonyParts online.  They had a free shipping deal that narrowly beat out the prices at NPD which is where everyone else seems to get parts.  $101.96
front frame rail patches,
shock tower patches


We also found some used bumper brackets on craigslist for ten bucks.  We need a new one of those as one of ours was badly rusted.


So, this is where we started:
Right
Left

During:


Where we ended:

Patches sitting in place:

This was a lot of drilling and prying.  Now we just have to weld them in.

Today cost: $111.96
Total project cost: $2,160.27

Saturday, May 21, 2016

DAY 9: Springs

We're getting a little tired of taking things off, but we can't repair the shock towers with those springs and shocks in the way.  Regardless of the videos that said the Ford lower shock bolts are tough to manipulate, we had no issues there.  Then we got to try out the coil spring compressor we rented (Autozone loaner. If you return it then you get all your money back).
Fun.  Mostly because it's rumored to be dangerous.
As useful as the coil spring compressor was, the pitman arm puller was useless.  I suspect we got the wrong size because we had no luck with it and resorted to a big hammer.  Then we could get good access to the shock towers on both sides.
And then we looked closer and saw this
Sad face
So, as it turns out we are going to try to just patch the shock towers.  We're going to have to patch the tops of both (significantly on the drivers side) and the low parts on the frame rails.  But if we're successful then we can avoid the cost and extra drilling and welding of replacement shock towers.

Eli did some cleanup work, but we need smaller cups and pads on our "wizzy wheel" grinder for the frame rail cleanup.

We're excited to finally put something ON the car rather than take things off.

Today cost: nothing
Total project cost: $2,048.31

Tuesday, May 17, 2016

DAY 8: Should we drain it first? Nah...

So, I read somewhere that it's a good idea to drain the transmission before you take it out.  We didn't do that.  We made the biggest mess this garage has ever seen.  It's only a year old... So, consider it broken in.  It didn't take too long and the transmission is now out.  Now we just have to figure out how we're gonna get it rebuilt.

Harbor Freight had these on sale for a crazy low price.  I imagine it will last a very short time, but it was so cheap I don't care.
So we tried it out doing some of this: 
Today cost: nothing
Total project cost: $2,048.31

Monday, May 16, 2016

DAY 7: What do we have here

C8DE. Apparently that means that our engine block was cast in 1968 for a Ford Falcon/Maverick.  That's cool I guess.  We knew it wasn't the original.  The head on the other hand says C9DE.  So, that's from a '69 Falcon/Maverick.

We took out the drive shaft in preparation to take the transmission out.  In retrospect, we should have set the car higher on the jack stands so we could drop the transmission down and get it out from underneath easier.  Lesson learned.  We'll have to devise a plan and jockey the jack around a bit to get everything lifted up.

Pawpaw gave us some new (to us) tools!
awesome.


This is great man-stuff right here:


Today cost: nothing - thanks Pawpaw
Total project cost: $2,048.31

Sunday, May 15, 2016

DAY 6: Let's pull the engine

Eli pulled off the passenger side fender.


And then:


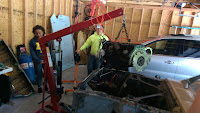
At the end of a good morning we had the engine secured to the engine stand:

It was actually a little strange.  Almost nothing went wrong.  Even the exhaust bolts came loose without a problem.  Plus... we got new tools!

Before you say "those aren't as good as Snap On" just shut up.  I know they're not.  But AutoZone is right down the street and warranties duralast stuff forever.  That coupled with the fact that their quality is ok and their price is HALF of Snap On... they'll work fine for us.

Before you say "you know they have LED drop lights now" just shut up again.  I know.  But there's some sort of weird appeal to these old type.  Super cheap.  Super simple.  Effective.

Also, a compressor!  Magna Force... whatever.  It compresses air.  We don't have any tools for it yet, but we aired up the truck tires with supreme efficiency!

Tools don't add to the cost of the project as they'll be used for projects forever.

Today cost: nothing - see above
Total project cost: $2,048.31

Friday, May 13, 2016

DAY 5: Wow, that's rusted

After popping the silver trim off the driver side rocker panel we removed the driver side fender.


Now we're getting somewhere!  Also, we got a good look at those rust spots we knew were going to be trouble.  As it turns out they looked much worse with the fender off:
top down view of the driver side shock tower


We will most likely have to replace at least part of the shock tower, but still plan to weld patches on the fender aprons so we can keep them.  The original front fender apron with the VIN stamped on it is still in place so we want to keep that.  Also, it's not as expensive if you get to reuse SOME of the existing parts.
Today cost: nothing
Total project cost: $2,048.31

Thursday, May 12, 2016

DAY 4: Come on, let's get started

Eli is a bit anxious to get the engine out.  He knows we can't just pop it out with a screw driver, but at the same time he's not real excited about persuading trim to come off without destroying it.  Finesse isn't really his game.  To be fair, I'm not great at it either.  Nonetheless, we started taking trim off.  I guess we're sort of working front to back.
Before Day 4


Removing the bumper is easy, but we did break 3 bolts.  It gave us a gentle reminder of the age of the vehicle.  Screws holding the large silver trim on are covered by slivers of silver trim.  We found out that there are little bolts with nuts on the back.  You can access them from inside the grill/fenders.  Once you twist them the trim piece pops off (and it doesn't even mangle it!) giving you access to the large silver trim's screws.  Once you take all that out of the way, the grill is trivial to remove.  Next was the radiator and then we dropped the front fender on the ground.
After Day 4


This was only an hour or two of messing around.  We plan to get an air compressor and some air tools to help us going forward.  We quit relatively early to go watch the Blues destroy the Dallas Stars in game 7.
Today cost: nothing
Total project cost: $2,048.31

Tuesday, May 10, 2016

DAY 3: Just looking

We didn't have much time today, but we did verify that the old battery was garbage.  With that known we borrowed the battery from "the little guy" and turned the engine over just for fun.  At least we know it turns over.

We couldn't manage to get gas to the carburetor so there was no chance of it firing at all.  We're going to move ahead with the engine removal.  Eli removed the hood but that's about all we got accomplished.

He was pretty excited to see everything light up with the battery in though! He flipped all the switches and levers.  Everything works electrically except the reverse lights.  We're a long way from needing those so no one is too worried.

Today cost: zero - we put the battery back in the truck
Total project cost: $2,048.31

Monday, May 9, 2016

DAY 2: Preparation

Knowing we were going to need them, we drove to Pawpaw's house to get the "cherry picker" and the engine stand.  One of the parts we look forward to the most is rebuilding the engine as this will be the first time for both Eli and myself.  Given that fact, we plan to rebuild the existing engine rather than have our "first-try-learning-experience" on something more expensive.

When we got home from Pawpaw's house we had a box full of window cranks, some door locks and a new ignition (the car was purchased with no keys).  That's all in addition to the tools we actually went there to acquire.

We put the battery on the trickle charger (we assume it's junk, but you never know) and popped in the new ignition... We'll try to turn the engine over tomorrow.

No pictures today. I need to do better at that.
This day cost: help Pawpaw paint the old porch swing
Total project cost: $2,048.31

DAY 1: We bought a car


We rented a car dolly from Common Cents Rental in Fenton.  Local businesses are cool and the only other suggestion I had was UHaul and I've never had a good experience with them.  After driving around to 3 different credit unions trying to withdraw cash from my account we were ready to go.  We were anxious to commit and I'm not great at negotiation so we pretty much just drove to Florissant, MO and bought it.   Steve, the previous owner, helped us push it down the driveway and shove it up on the dolly.
 

My '03 Ford Ranger known as "the little guy" had no issues tugging it home.  Here is Eli holding the title.  The middle garage door there is where the Mustang will stay for a while.

We manually pushed/pulled the car into the garage.  It was tough... but not as tough as trying to figure out how to get $2,000 in cash at one time when your credit union has no local branches.


Plain Jane coup with dents and dings and rust.  As promised. I should have negotiated harder.  I think he would have given a few more hundred.  Oh well.  Eli spent a few hours cleaning the car out.  I was done for the day with other plans.
Car dolly rental:  $48.31
Car: $2,000.00
This day cost: $2,048.31
Total project cost: $2,048.31

DAY 0: Idea

Eli decided that we should buy an old car and "fix it up." Notice that he did not say "restore."  We've landed somewhere between "just get it running" and "mint."  We plan to DIY as much as possible, obviously.  After calling Uncle Ned (who owns a '56 Chevy) and Pawpaw (our car/engine/mechanical expert) we learned that step #1 is to choose a car.  This negated our previous craigslist browsing for almost anything old.

After much contemplation Eli chose a Mustang between '68 and '72.  It should be noted that I tried very hard not to influence his decision here.  I would not have chosen a Mustang.  The fact that he did choose a Mustang is actually a relief to me because now I'm certain that he made the decision on his own.

So began the specific searching.  Our purchase budget, previously at $1,000, had to be adjusted due to the fact that Mustangs are apparently pretty popular and nothing local was available in that range in a condition that we were comfortable with.  We talked to who we knew, made a post on his Mom's facebook page, scoured craigslist and ebay, and googled until we were sick of it.  In the end, craigslist won out with a local post by a fellow named Steve who had inherited a '68 Mustang coup from his deceased father.  It had ~165,000 miles on it (5 digit odometer and only 1 titled owner), a non-original 200ci straight-six, some body rust, and all the wear and tear of an "every day driver" that is 48 years old.  He had the title (and the original bill of sale).  It had been sitting in a garage since the '90s.  Effectively, it seemed right in our wheelhouse for a price of $2,200.  That price was higher than we wanted, but, for what we could see in the pictures, it was the best deal available.  We set up a time to go see it on 5/8/2016.

This day cost:  $0
Project cost to date:  $0