Saturday, December 31, 2016

Put the Engine and Transmission Back In

So, we got a tip from Pawpaw about bolting the engine and transmission together and putting them into the car in one piece.  That sounded good so we decided to try it since we'd both struggled lining up bell housing bolts to mounted engines on other jobs.  As it turns out it was the torque converter that drove us nuts today.  It wasn't sitting into the transmission all the way which made it impossible to fit the transmission and engine together.  After the 4th try, we finally got that figured out and they fit right together.


Then we figured we'd try to drop it in there.  This actually went very smooth.


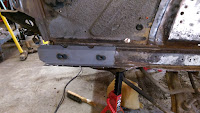
The idea was to have a pretty steep angle.  It seems odd hanging from the hoist like that, but once you drop it in and begin lowering it, you "catch" the transmission with a floor jack and it all starts to level out.  The transmission mount bracket went in like a snap and the motor mount bolts weren't much trouble either.  A little wiggling was all it took.


Today cost: $0
Total project cost: $3113.67

Wednesday, December 28, 2016

Engine reassembly finished

Before:
After:


So, the timing set we bought from RockAuto.com... the gear on the crank shaft was very slightly bigger than the old one so the timing cover wouldn't fit on.  Real dumb.  So, we just put the old one back.  I'll have to go to the site and leave a lousy review.  Also, we nearly destroyed the timing cover seal when some idiot (me) put it on backward and had to take it back off.  Hope it doesn't leak!

Looks like a real engine again huh?
Today cost: $0
Total project cost: $3113.67 

Tuesday, December 27, 2016

Engine reassembly

So, we did buy the wrong bearings.  But that's ok, we ordered the right ones according to what was in there and reassembled the engine.


I didn't take enough pictures apparently, but the cleaned up rods went back in with no real trouble. Fresh rings, new bearings... It'll probably work.  Eli sprayed some Ford blue high temperature paint on it to make it look pretty.


Also, we ordered some new brake lines at some point.  CJPonyParts.com put them on backorder for us so we had to wait a while, but they came in and we replaced the long line running from the front to the back.  This clears the way for us to put the engine and transmission back in once the engine assembly is wrapped up.  Upon further inspection, we may be able to reuse some of the other brake lines.  They don't look bad at all.  The long one had some rust/corrosion at the rear so, we decided it was best to yank it out.

This day (pre-bent brake lines) cost: $112.99
Total project cost: $3113.67

Wednesday, November 23, 2016

Engine disassembly Day 2

Today Eli finished disassembling the engine while I was at work.  That consisted of him removing the harmonic balance (thanks for the tool Pawpaw):

Then he removed the timing cover, water pump, and crank shaft.
After that he scraped all the gaskets and cleaned out the piston ring grooves.  While he was busy I finished welding on the passenger side fender apron patches.
Also, we found this tacked to the side of the engine.  Turns out it's a re-manufactured engine.  And we might have ordered the wrong sized rings.  More on that to come...

This day cost: $0
Total project cost: $3,000.68

Tuesday, November 22, 2016

Many days later: What the heck have you been DOING?

The summer was pretty busy but we have begun working in earnest again.  First off, we got the transmission overhauled.  It was $550.  We chose Transmissions To Go in Arnold, MO based on their competitive price and a personal reference.
after
before


We're going to replace the brake line before we put it back in.  Those are ordered.  Here are some pics of our amateur welding skills.
before
after


after


before


battery shelf reassembled
passenger side in progress


Next we ordered the engine re-ring kit.  We got it from Rock Auto due to their pricing and extensive selection.  It was $290.41 for rings, rod bearings, crank shaft bearings, a timing set, a water pump, and a full gasket set.  Then we started taking apart the engine.  This was the part Eli looked forward to the most so it was nice to get going.


We got the rods out.  We need a harmonic balance puller tool to finish the disassembly.  So, that's where we are for now!

These days cost: $840.41
Total project cost: $3,000.68

Monday, May 30, 2016

DAY 11: Cut out the rot

So we started cutting out rust and preparing to cut patches out of good metal.
Battery compartment before

Battery compartment after


Driver side shock tower holes
Pass. side shock tower holes
Then Eli started spray painting on the driver side fender apron he had already sanded down:

Then he started grinding down the passenger side.  He decided to keep the original sticker with instructions for how to change the oil:
silver!
We got a bench grinder... technically to sharpen lawn mower blades.  But also to assist us in the patch making process.  That's our next step.  Then, welding!
Today cost: $0
Total project cost: $2,160.27

Thursday, May 26, 2016

DAY 10: Front frame rail patches

We made our first two parts purchases.  The first was from CJPonyParts online.  They had a free shipping deal that narrowly beat out the prices at NPD which is where everyone else seems to get parts.  $101.96
front frame rail patches,
shock tower patches


We also found some used bumper brackets on craigslist for ten bucks.  We need a new one of those as one of ours was badly rusted.


So, this is where we started:
Right
Left

During:


Where we ended:

Patches sitting in place:

This was a lot of drilling and prying.  Now we just have to weld them in.

Today cost: $111.96
Total project cost: $2,160.27

Saturday, May 21, 2016

DAY 9: Springs

We're getting a little tired of taking things off, but we can't repair the shock towers with those springs and shocks in the way.  Regardless of the videos that said the Ford lower shock bolts are tough to manipulate, we had no issues there.  Then we got to try out the coil spring compressor we rented (Autozone loaner. If you return it then you get all your money back).
Fun.  Mostly because it's rumored to be dangerous.
As useful as the coil spring compressor was, the pitman arm puller was useless.  I suspect we got the wrong size because we had no luck with it and resorted to a big hammer.  Then we could get good access to the shock towers on both sides.
And then we looked closer and saw this
Sad face
So, as it turns out we are going to try to just patch the shock towers.  We're going to have to patch the tops of both (significantly on the drivers side) and the low parts on the frame rails.  But if we're successful then we can avoid the cost and extra drilling and welding of replacement shock towers.

Eli did some cleanup work, but we need smaller cups and pads on our "wizzy wheel" grinder for the frame rail cleanup.

We're excited to finally put something ON the car rather than take things off.

Today cost: nothing
Total project cost: $2,048.31